Mail Merge and Label Generation
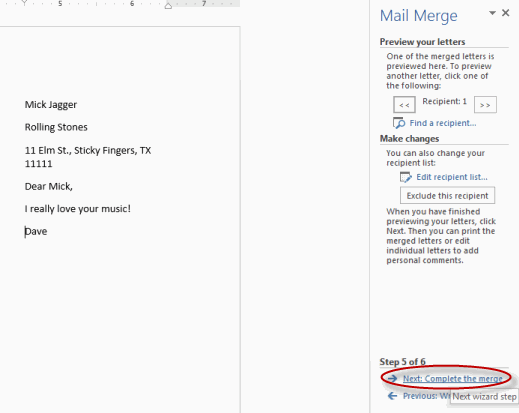
Preview your letter and click Next: Complete the merge.
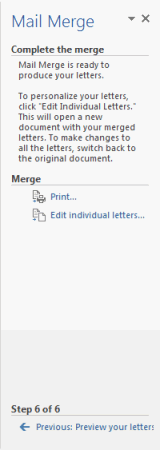
Click Print to print your letters or Edit individual letters to further personalize some or all of the letters.
- INTRODUCTION Mail Merges allow companies to send the same letter to a large number of people without having to manually change the name, address and other contact details of the recipients. Mail Merges are beneficial as they are much faster and automatic compared to manually change the address and name of the recipients manually.
- STEP 1. Open Microsoft Word click on the ‘Mailings’ Ribbon and click on ‘Start Mail Merge’
- . STEP 2. A drop down box will appear where you can select what document you would like to use a mail merge for. In this tutorial I will be using the Letters document type.
- STEP 3. Next click on the Select Recipients Button which is next to the Start Mail Merge Button. Once Clicked a drop down list will appear where you can select a data source for your mail merge. If you do not have a database to use or an address book you can type a new list which I will be using in this guide.
- STEP 4. A Dialog Box will appear where you can enter details about customers you want included in the mail merge. If you want to add a new record you can click the New Entry button and if you wish to delete it you can click the Delete Entry button.
- STEP 5. Press OK after all your records have been entered and save the data source with an appropriate title such as “Customer Records”
- STEP 6. When writing a letter insert merge fields for things that are unique to each person such as First & Last Name or Address. To do this click on the Insert Merge Field Button where a drop down list will appear where you can select the Fields.
- STEP 7. Eventually you’re letter should look something like this Merged Fields have “<<“ and “>>” between them. Such as “<<Last_Name>>”
- STEP 8. Once you’re merge fields are entered into Microsoft Word, click Finish & Merge button which can be found at the top of the Mailings Ribbon. When clicked you can choose to either send as e-mails to each person or print the documents.
Mail merge is a process to create personalized letters and pre-addressed envelopes or mailing labels for mass mailings from a form letter.[1] The feature is usually employed in a word processing document which contains fixed text (which is the same in each output document) and variables (which act as placeholders that are replaced by text from the data source). The feature dates back to early word processors on personal computers, circa 1980. WordStar was perhaps the earliest to provide this, originally via an ancillary program called Mail merge. WordPerfect also offered this capacity for CP/M and MS-DOS systems, and Microsoft Word added it later on.[2]
The data source is typically a spreadsheet or a database which has a field or column for each variable in the template. When the mail merge process is run, the word processing system creates an output document for each row in the database, using the fixed text exactly as it appears.
Steps in creating a simple mail merge
- n a blank Microsoft Word document, click on the Mailings tab, and in the Start Mail Merge group, click Start Mail Merge.

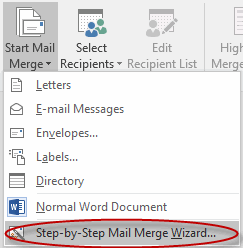
- Click Step-by-Step Mail Merge Wizard.
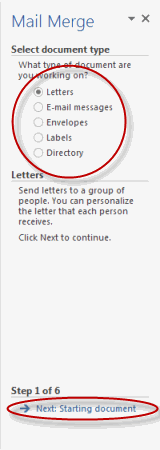
- Select your document type. In this demo we will select Letters. Click Next: Starting document.
- Select the starting document. In this demo we will use the current (blank) document. Select Use the current document and then click Next: Select recipients.
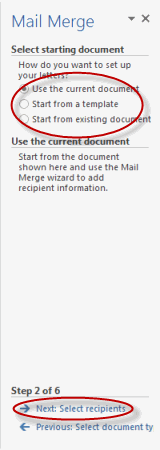
- Note that selecting Start from existing document (which we are not doing in this demo) changes the view and gives you the option to choose your document. After you choose it, the Mail Merge Wizard reverts to Use the current document.
- Select recipients. In this demo we will create a new list, so select Type a new list and then click Create.
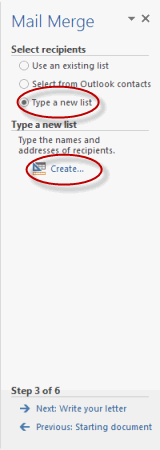
- Create a list by adding data in the New Address List dialog box and clicking OK.

- Save the list.
- Note that now that a list has been created, the Mail Merge Wizard reverts to Use an existing list and you have the option to edit the recipient list.
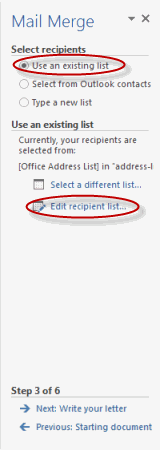
- Selecting Edit recipient list opens up the Mail Merge Recipients dialog box, where you can edit the list and select or unselect records. Click OK to accept the list as is.

- Click Next: Write your letter.
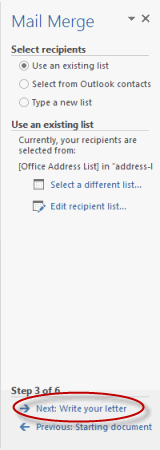
- Create a list by adding data in the New Address List dialog box and clicking OK.
- Write the letter and add custom fields.
- Click Address block to add the recipients' addresses at the top of the document.
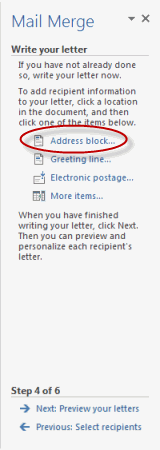
- In the Insert Address Block dialog box, check or uncheck boxes and select options on the left until the address appears the way you want it to.
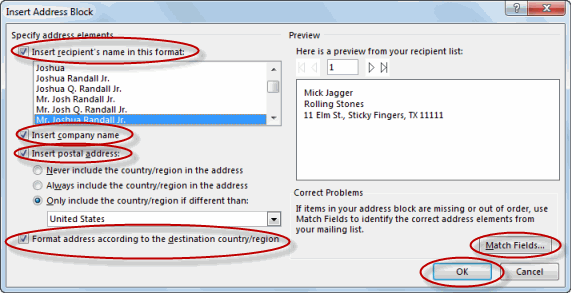
- Note that you can use Match Fields to correct any problems. Clicking Match Fields opens up the Match Fields dialog box, in which you can associate the fields from your list with the fields required by the wizard.

- Click Address block to add the recipients' addresses at the top of the document.
- Press Enter on your keyboard and click Greeting line... to enter a greeting.
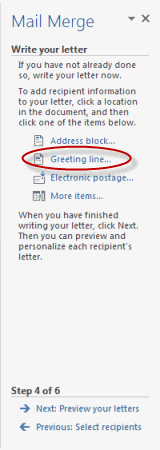
- In the Insert Greeting Line dialog box, choose the greeting line format by clicking the drop-down arrows and selecting the options of your choice, and then click OK.

- Note that the address block and greeting line are surrounded by chevrons (« »). Write a short letter and click Next: Preview your letters.


yan na sir william
TumugonBurahinyan na sir
TumugonBurahinyan na sir:)
TumugonBurahinyan na sir
TumugonBurahin